
![]()
Make it Monday!
Hey friends!
My son had recently outgrown his Lego Duplo table. I found him using it more as a junk storage solution. So, it was time to donate it.
I still really liked the idea of having a Lego table for him. When I play Lego’s with him, I always end up with a back ache from bending over to the floor for a long period of time. So, to be honest, the table is more for me! ha
I had been thinking about making a new table for him…I just had to find the right table.
Luckily, our community has bulk trash the first Monday of each month. I call it my “dumpster diving day.” I’ll load up the kids and we will drive around and see what goodies we can find. I’ve found playhouses, water tables, cabinets…all sorts of good stuff! We are in base housing. So, a lot of families come and go and bulk trash is how they get rid of a lot of their items when moving (it makes me sad to see so much waste.) But, I always find something and find a new purpose for it!
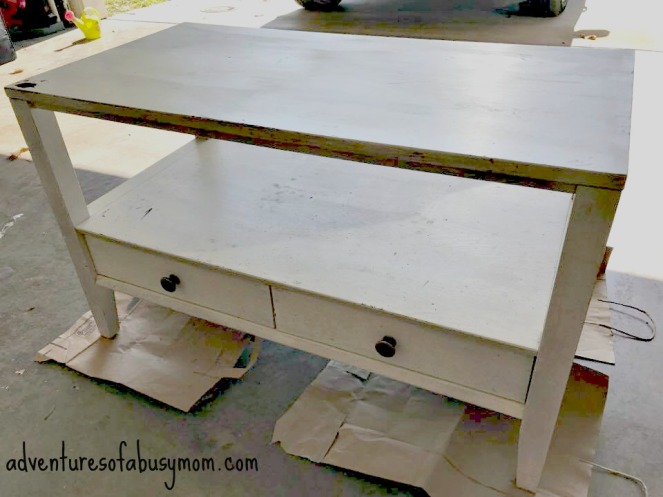
On this particular “dumpster diving day,” I picked up a cute little coffee table. I honestly had no clue what I was going to do with it yet. But, it was solid wood and I could see behind its flaws to it becoming something great.
So, I loaded it up in the back of my Explorer and proudly hauled it home with me.
My husband came home later and saw this. I could tell he thought I was crazy. But, he has learned through our almost 10 years of marriage to not doubt me! So, he kept quiet.
Okay, looking back at this, I don’t 100% blame him for doubting me…It was pretty nasty looking. ( the picture doesn’t do it justice…the drawers were full of dirt. Some of it was painted-some of it had really chipped away. The best thing about it was the knobs…which I took off anyway!)
After this sat in my garage for a day or two, I had a few options for it. Ultimately, I decided THIS was the answer for my Lego Table dilemma!
Step One: Paint!
I dug out some paint samples I had from another project I made in my sons room. This was going to be perfect! I got it all painted and, while it dried, headed to Target to get some Lego plates for the top surface of the table.
Step Two: Cut the Lego Plates!
I felt kinda guilty as I grabbed a stack of the Lego plates (at roughly $8/plate this project was no longer “cheap”). But, I was too excited to stop now and I figured a new Lego table would cost even more. So, off we went to the check-out lane when I hear a voice say, “Please don’t buy those Lego plates.” I didn’t know if it was God or my self-conscious telling me this but I stopped dead in my tracks! I turned around to find a friend of mine standing there. She told me she had some that she had been trying to sell and that I could have them for FREE! Talk about a blessing!!!! We met up later and I excitedly brought my treasure home to finish my project.I laid the Lego plates all out on the surface of the table and used an exacto knife to cut them to the proper size.
Tip: I used the thick Lego’s to hold all of the seams together while I was measuring out the size I needed.
Step Three: Attach the Lego plates to the table top!
I kept the Lego plates connected by Lego’s for this step. I wanted to make sure the dots lined up to where the Lego’s would be placed on the table for building.
I used about half of a bottle of Gorilla glue to attach these. I just lifted up the piece (all one piece since they are connected) and swirled a bunch of glue around. Make sure you get close to the edges and seems so that they won’t pull up when your kids are pulling Lego’s off of the table.
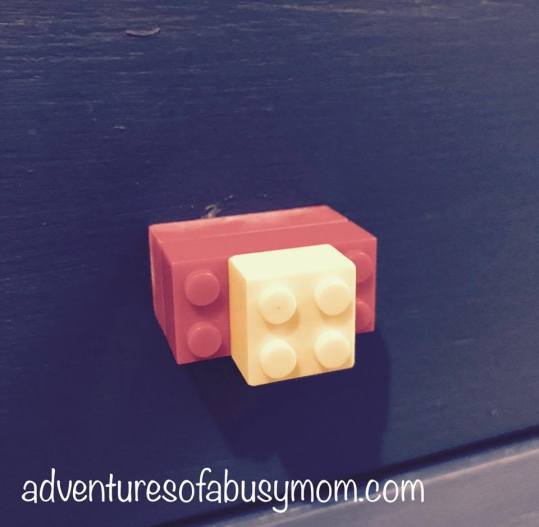
Step Four: Re-attach knobs!
If your table has drawers like mine, I removed the knobs to paint it. When I went to replace the knobs, I decided I wanted to do something creative so I “built” some knobs out of some leftover Mega Blox that I was going to trash (since we just kept the Lego brand). I put the original screw in the hole, squirted some super glue inside the Mega Blox piece and slid the Mega Blox piece onto the screw. I held it for a moment to make sure it was dry.
It turned out really cool. My son loves it!
Step Five: Let the glue dry!
This was the hardest step for us! We wanted to get to master building right away! But, I wanted to make sure the glue was good and dry. So, we let it sit for a couple of days (a day would’ve probably been good enough).
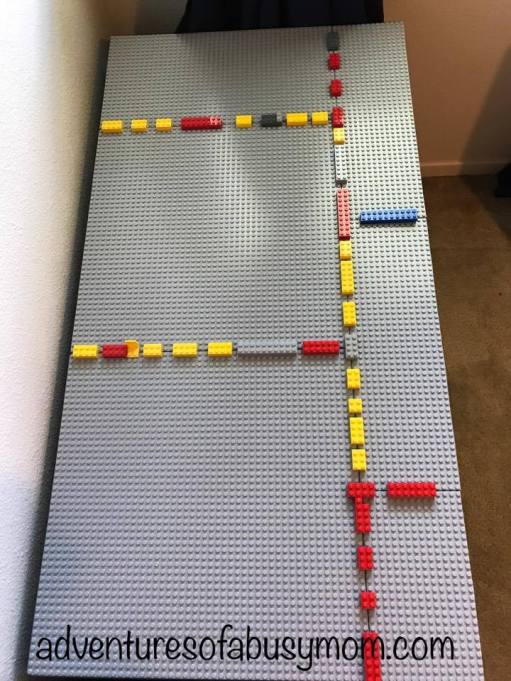
Step Six: Get to building!
My son has been watching the TV show American Ninja Warrior lately. It inspired him to build this (isn’t he just so cute):
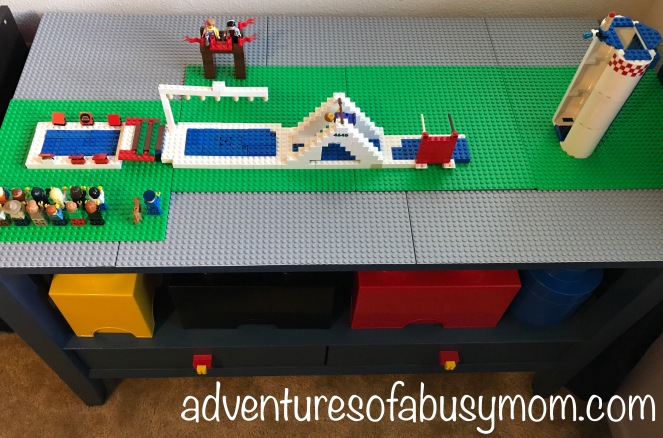
His creativity just blows my mind!
***to see a video he made of his American Ninja Warrior course in action, check out the post on my Facebook page: https://m.facebook.com/adventuresofabusymom/
I hope this encourages you to get creative! Post any questions or comments below! Thanks for stopping by!
Please like and share this!


I really miss playing with lego’s. And the table you and your husband have created looks like it will (and already has) inspire so much creativity.
LikeLike
Thanks! We are kids at heart and love to do Lego’s as a family! This was all mommas doing too! 💪🏻
LikeLiked by 1 person
Awesome job mom Lacy!! I’m glad you finally built that table!! I’m still sad that my niece & nephew out grew their legos… technically, not even out grew them.. “wasn’t interested”! *GASPS* I KNOW, RIGHT?! I don’t get it either lol.
He sure has a creative mind, I see where he was going with the Ninja Warrior idea. I know for sure he’s gonna make you a little Hawaii village one day! =P
LikeLiked by 1 person
Thanks! I think we will do Lego’s forever in this house! We all enjoy doing them as a family!
I wish I could show you the video he made of the guy going through the course! I bet I can post it to the FB page. Check it out! https://m.facebook.com/adventuresofabusymom/
LikeLike
Hmm, I may be looking for one for my son. It’s cool.
LikeLike
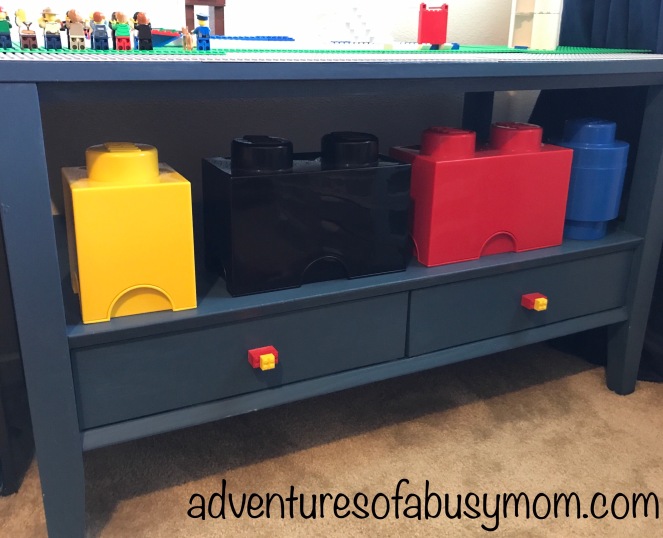
Glad you like it! It’s been working out really well! It’s nice to pull it out from the wall and we can play on all 4 sides that way. But, like I said, the best part is my old lady back gets a break from bending over to the floor bc it’s raised up. Definitely try to find one. A thrift store or Good Will would be a great spot to check for a cheap table!
LikeLiked by 1 person
My o my! You are a genius! Very unique and creative!
LikeLike
😊awe you’re too sweet. Thanks!
LikeLike
I’m truly inspired. I will definitely attempt this, when I find a bit of space in my house. My two boys will love it. Thank you! 💝💝
LikeLike
Keep me posted! I’d love to see how it turns out! And, remember, it doesn’t take a ton of paint. So, I just bought the sample size at Lowes. They can tint it to whatever color you want. They even occasionally have it on sale for 99 cents! There are also stick on pieces you could use instead of the Lego plates. That would make it less costly as well! I’ve seen it on Amazon 🙂 Good luck!
LikeLiked by 1 person
You both are extremely creative. I would love to start doing some “diy” projects. This is definitely inspiration!
LikeLiked by 1 person
Thank you! There’s just something about bringing something old to new life…it charges me up!
LikeLiked by 1 person